INSTALLING A LO-SWING SAFETY
If you intend to install a
scope on a Large Ring Mauser (and that is just what a
K.KALE is) the 1898 safety must be changed to a low
swing or a side swing unit or a trigger with an integral safety must be
installed.
The side swing units are pretty
expensive and may require some fancy machine work.
BUT, here's
a link showing how it's done J
. Side Swing Install.
A trigger with the safety
built-in (I have found BOLD's to be very good) is a good option at $35 and if
you are in need of a single stage trigger, that’s the way to go. The BOLD,
Dayton-Traister and Timney
units can be had with and without safeties. (Best is to look in your Brownells
catalog) Those without safeties may require some wood removal (hidden) inside
the stock. Units with integral safeties need wood removed on the right side,
where the thumb falls, along the side of the action.
I have found the best bet is to
replace the bolt-mounted, three-position safety with a two-position unit. Brownells
has two styles of replacement safeties, a Timney unit
at $33 and two Traister style units at $13. The Traister unit simply replaces the Mauser
safety, just drop it in. However, it does have a small screw that can be lost.
I prefer the (cheaper) one-piece safety although some "gunsmithing"
is required.
The work required is to cut a
1/8-inch notch in the bolt shroud. The shroud is very hard and the notch will
need to be cut with an abrasive wheel. The best thing to use is a Dremel tool with an abrasive disk.
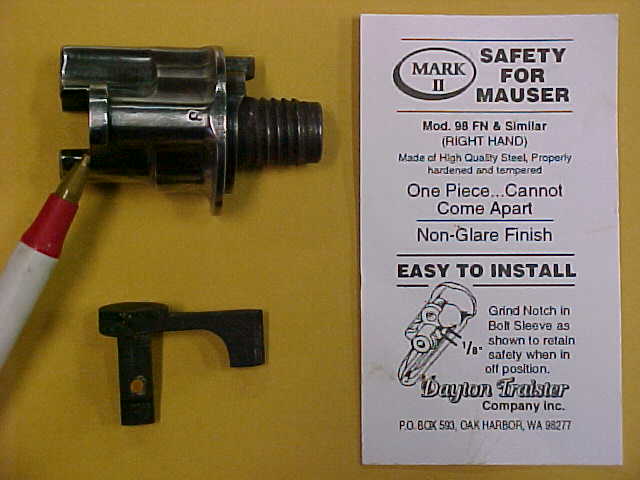
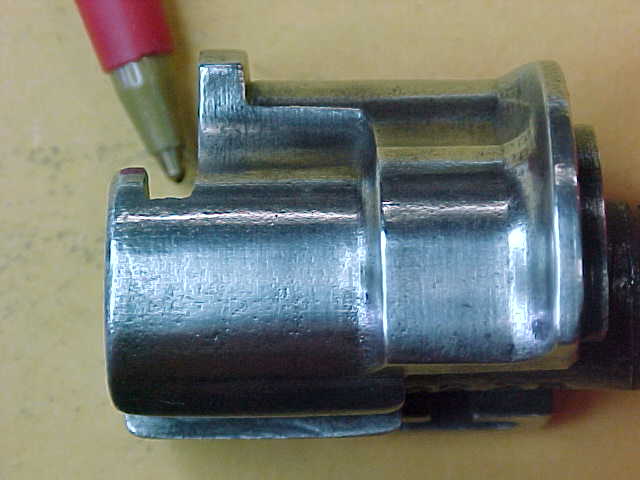
Above are the pieces needed. To
the right is the instruction sheet that comes with the "Mark II"
safety. Note that the model used is the Mod. 98 or FN style. Top left is a Turk
bolt shroud, the pen is pointing to the area to
receive the notch. Bottom left is the safety itself. Note the small red dot on
the safety, more about that later.
Before starting, you must
understand how the Mauser safety works. One of the
reasons that the Mauser design has endured for over
100 years is the amazing simplicity of the Mauser
brothers' design. So lets
look at their design. First, make sure no ammunition is present. Second, slowly
close the bolt in the action, with the safety off, while watching the cocking
piece. Note that the cocking piece moves to the rear during the last 1/4-inch
or so of bolt travel and during the clocking of the bolt. This movement
indicates that the cocking piece is being held by the trigger mechanism, and is
ready to fly forward if the trigger is pulled. Now rotate the safety to the
safe position while watching the cocking piece. Notice that it again moves to
the rear. THIS MOVEMENT IS VERY IMPORTANT !!!
It is this movement that removes the trigger from the picture, as the cocking
piece is now resting on the safety. The movement is caused by the wedging or
camming action of the safety as it is rotated. If the cocking piece is not
moved back, the trigger may be pulled, with no effect, but the rifle will fire
when the safety is released.
OK, play with the action
(unloaded) and make sure you understand the operation of the safety.
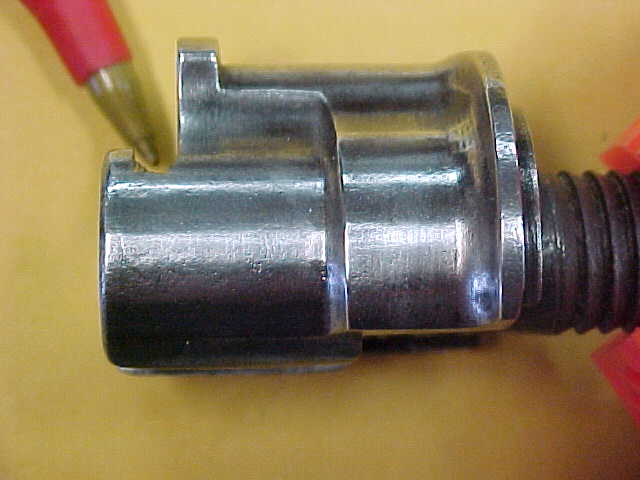
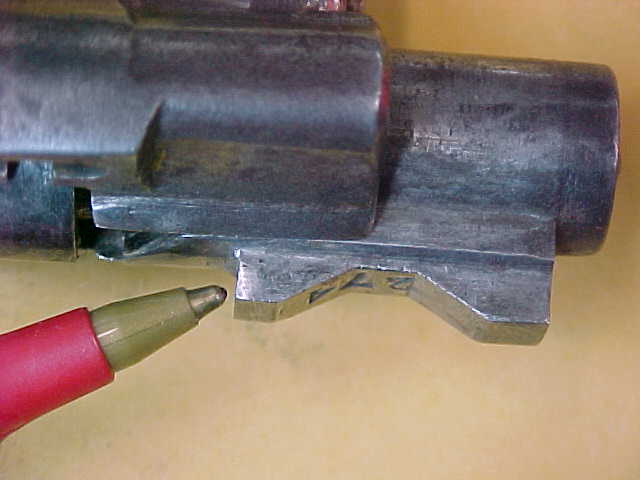
This shows the start of the
notch, at the tip of the pen. First make sure that the WIDTH of the notch is
correct. Do this by installing the safety and trying to rotate it closed. Once
the width is correct, deepen the notch until the cocking piece slides freely
when the safety is in the notch.
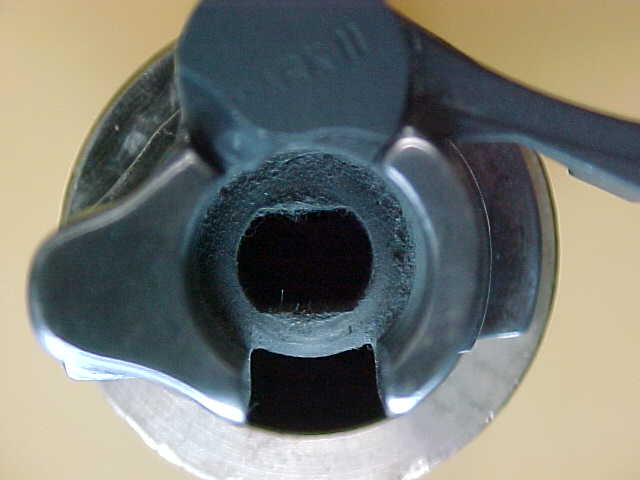
Here is the safety installed,
but the notch is not deep enough.
Here the notch is just a tad to shallow. One more light touch with the wheel will do it.
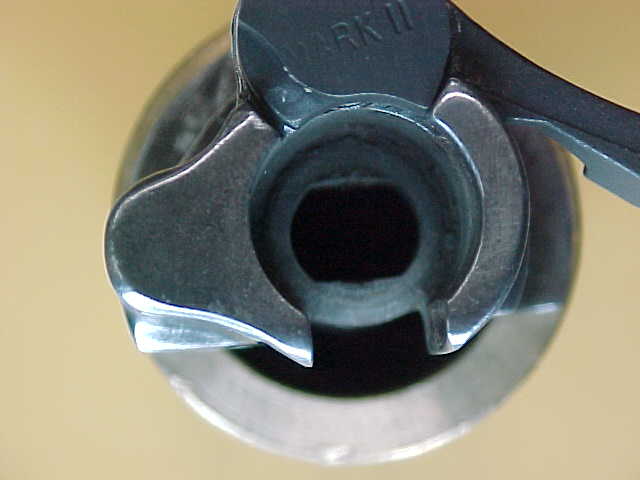
Here is the completed notch.
Now, about the red piece of
plastic. Sometime I just leave it out, but I guess the manufacturer had a
reason for providing it. So, cut it off almost flush with the shank, and push,
press, force, the safety into the shroud. I guess the plastic keeps it from
rattling.
NOW, MOST IMPORTANT
!!!! Assemble the bolt, put it in the action, close and cock the bolt,
and try the safety.
If the safety does not go on,
tear it down and either grind LIGHTLY the edge of the ramp on the safety or the
cocking piece. Remove as little metal as possible and try for proper operation
often.
If the safety goes on and moves
the cocking piece to the rear, leave it on and pull and release the trigger,
and then release the safety. If the rifle does not fire, then all is OK.
In the rare cases where the
safety rotates but does not move the cocking piece to the rear either replace
the cocking piece, or very carefully remove some metal.
VERY CAREFULLY remove some of
the face of the cocking piece where is rests of the trigger release. The pen
shows where. Try the bolt in the action often and don't remove to much.