
IF YOU REACHED THIS PAGE VIA A SEARCH ENGINE
THIS WILL TAKE YOU TO OUR HOME PAGEThis will take you to the Index for this series.
Installing a Side-Swing Safety
Page 1 of 3
I inherited a half completed, poorly done sporterized Swede M96. It was fitted with a cock-on-open conversion and a Dayton-Traister safety. But the safety kept falling out because of the poor installation job. SO:
I purchased a Precise Metalsmithing Two-Position Safety Kit from Brownells at $30.
The kit contained five pieces and a set of instructions. Ý Ý Ý
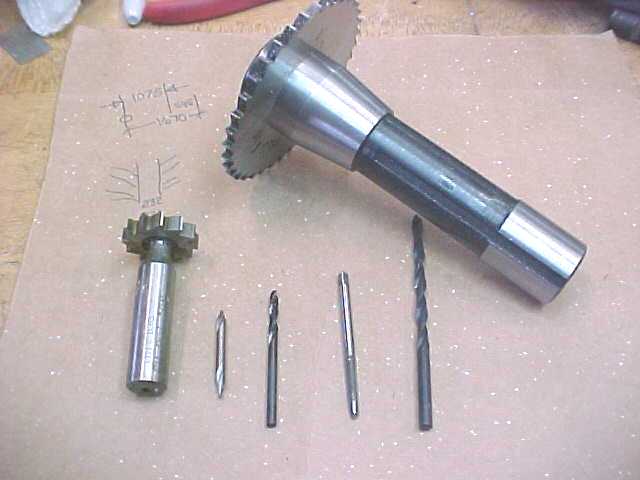
These are some of the tools needed to install the safety into a Mauser bolt shroud. Ý Ý Ý The big fellow is a 1/8-inch thick by 3-inch diameter metal saw ($10-Wholesale Tool) mounted to an R8 arbor (to fit my mill). From the left is a 7/32 x 1-inch Woodruff Cutter (#708, $6 -Wholesale Tool), a No. 1 center drill, a #31 drill, a 6x48 tap, and a #25 drill.
The first step involved annealing the shroud to allow working the shroud with cutting tools. This was accomplished by heating to a dull red heat and quickly burying the whole thing in dry sand.
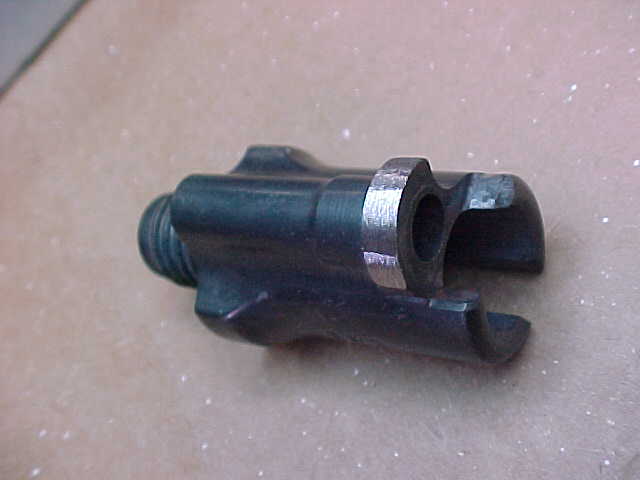
The ridge around the rear of the safety spindle hole is next removed. Ý Ý Ý The bright area is the ridge, work is continued until it is all removed.
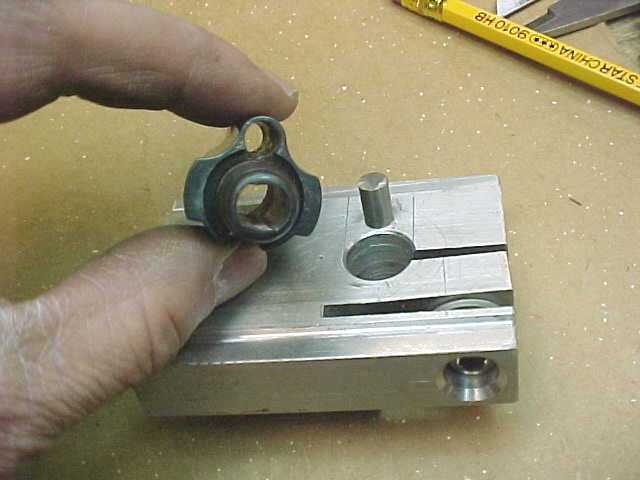
Because of the odd shape of the shroud, I made a clamping jig to hold the shroud while the metal-working was done. This is a Link to the JIG construction.

Here Ý Ý Ý is the shroud in the jig (note that it's "upside down"), in the mill vise, ready to be drilled. I used the #1 center drill to start the process.
This will take you to the Index for this series.