Bedding
the Rear Screw - or - Installing the Pillar
The rear of the Mauser action is somewhat fragile and over tightening of the rear screw that connects the receiver tang with the rear of the floor plate will result in bending the tang, the floorplate, or crushing the wood of the stock. Additionally, since the rear screw hole in the receiver is drilled through (unlike early Springfields) an over tightened screw may protrude into the bolt-way and prohibit operating the bolt.
The pillar will stop all this foolishness. This text will assume that you have a pillar as described earlier. If you have a pillar from some other source, modify my instructions as to dimensions.

Install the rear screw through the hole in the floor plate and wrap tape around the screw until the pillar slips freely, but snug, over the tape.

Next, coat the rear tangs, the screw, the tape, and the inside of the pillar with release agent. DO NOT COAT THE OUTSIDE OF THE PILLAR. Use a swab to do the inside of the pillar, and a brush for everything else. Make sure that the threads on the screw and tang (inside) are coated.
Now, while the release agent is drying, let's talk about the release and the bedding epoxy. If you have read these texts, you must know that I use Brownells as a source for most of my specialized stuff. I have no connection with Brownells, I just think they offer the best thought-out selection of supplies for the gun-trade. Brownells offers three kinds of bedding epoxies, Acra-Glas, Acra-Glas Gel and Steel Bed. I prefer Acra-Glas. It has the consistency of thin pancake syrup and can run into the smallest openings. This seems to "wet" the surface and allows the epoxy to re-fill a space if things move during assembly. The downside of this thin consistency is that the stuff will not stay, it tries to run every where, and great care must be used to insure that it doesn't run somewhere unintended and gum up the works.
Brownells other epoxies as well as Devcon B (used by Marine armorers when building M14's), have a very stiff consistency and are applied like body putty.
I use Brownells release agent as well, other agents are Vaseline, PAM and automobile and furniture waxes.
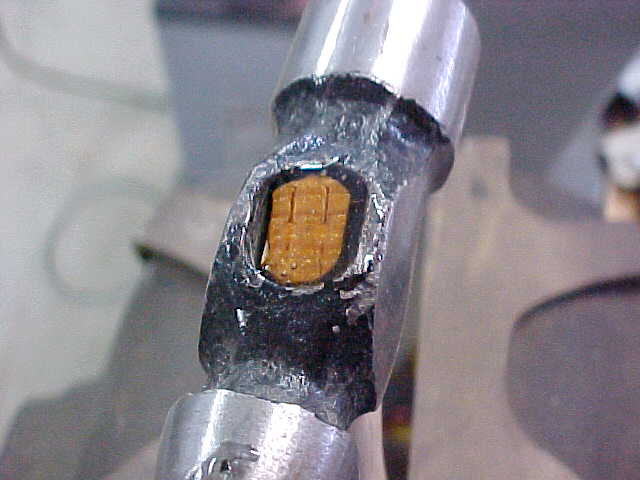
So why the hammer? Nothing seems to hold the head on like Acra-Glas. It runs down into the small opening between the wood and the head. But look closely, I did not just puddle the Glas atop the handle, but directed it to the right side, and left the left side empty. (See the speck of uncoated wood?) This allows the air to escape as the Glas runs down and fills the void. So remember, set something up to use the leftover Glas, and all ways let a vent so the air can escape.

Now drill the rear stock hole with a 7/16-inch drill, and turn the stock over and bell the hole with your pocketknife. Don't put the pillar in, this pic is just to show how loose the pillar fits. Drill the hole from the top, if it is not centered at the bottom, use the side of the drill or a rat-tail file to center the hole.
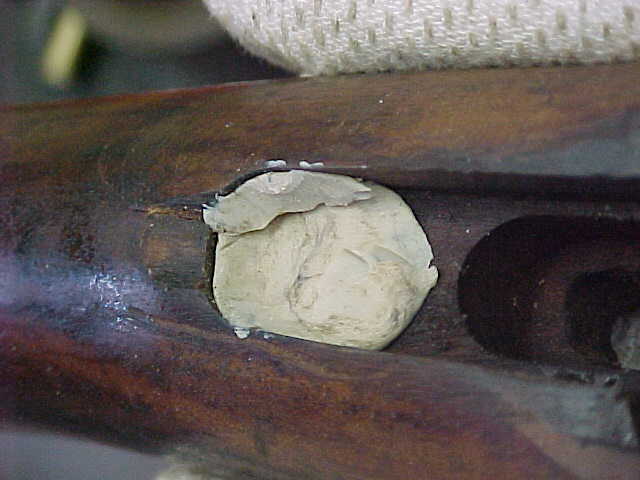
Take a chunk of modeling clay (from your child's' toy box) and make it look like a Nickel - the 5 cent kind, and put it over the rear hole. Don't fill the hole, just cover it, and the area around it.
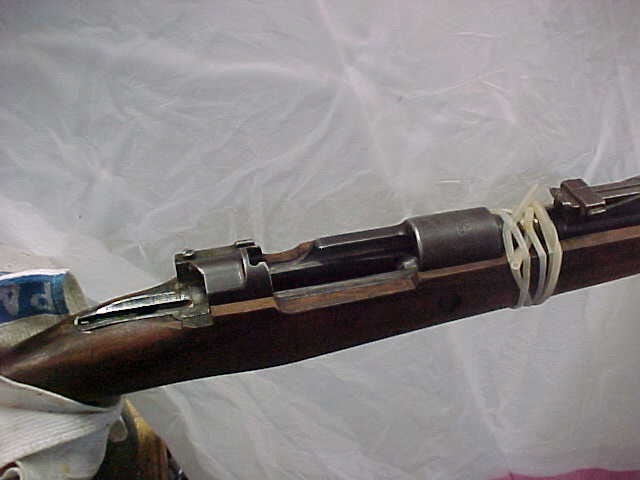
Put the action in the stock, sans bolt and trigger. This will squeeze the clay into the hole and around the rear tang. Hold the stock and barrel together at the breech end of the barrel. I used surgical tubing; you can also use tape, clamps or wire. Whatever is used it must be semi-permanent and must not interfere with installing the lower strap.