Bolt Jeweling - Part 3
If you got here via a search
engine, go here; Wagner Home,
or here; Bolt Jeweling
Part 1.
Let's make a jig.
Fasten the 5-inch pieces to the
7 1/2-inch piece as shown. I used three drywall screws at each end. You can
glue or reinforce the joints, as you like.

This is the firing pin end of a
rifle bolt,

This is the same end, but the
outside of the jig. At this end is the bolt that was drilled to receive the
brad, two washers one on either side of the wood, and two nuts, one on either
side.

This is the other end, the one
with the roll pin. Here the roll pin engages the cocking cam notch, and we have
one nut and one washer, both on the same side as the rifle bolt.

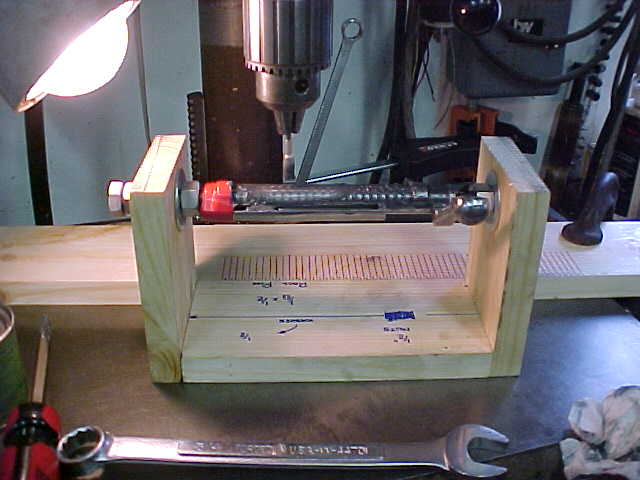
This is the outside of the jig
at the roll pin end. Note the colored bolt head and the vertical red line at
the top of the wood. As shown the vertical red line is aligned with a red
"point" on the bolt head. If the bolt is rotated until the red line
is centered on the black flat, the bolt will have rotated one-twelfth of a
turn.
Steve Wagner
Bellwood PA