LETS MAKE A 36-INCH TOASTER
OVEN
or
LETS MAKE A COATING CURING
OVEN FOR RIFLES
When I decided to use a heat
cured coating system instead of hot bluing on some rifles, I was faced with
finding an oven capable of holding a 30-inch barreled receiver. While I was
sure my wife would have no objection to my using the kitchen stove/oven (my
wife monitors the temperature of the hot bluing tanks when I'm using them, has
her own custom HiPower competition rifle built on a
highly modified AR-15 action, and regularly shoots in 600 yard matches using
iron sights.), I wanted to have something in the shop rather than move the work
into the house.
I briefly considered fastening
two or more toaster ovens together, and then hit upon this scheme.
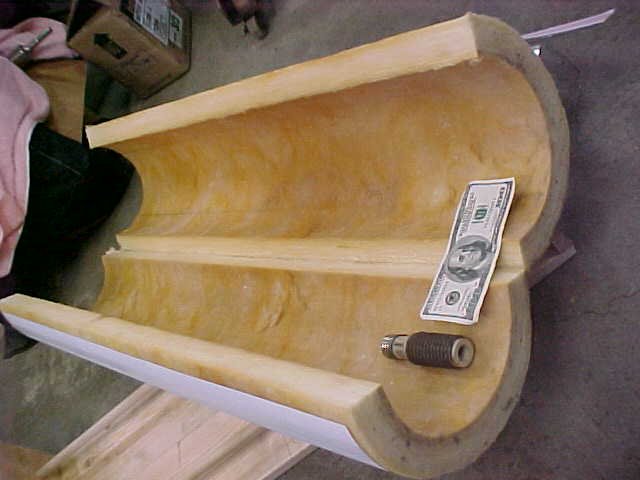
The long, rounded, yellow stuff
is a piece of Fiberglas HiTemp pipe insulation. When
the two halves are closed, it forms a tube 36-inches long, with a hole in the
middle 6-inches in diameter, and an outside diameter of 9-inches. This stuff is
used to insulate steam pipes and is capable of standing some pretty high
temperatures. Do not confuse it with LoTemp
insulation used to insulate pipes to prevent freezing or sweating. This
insulation comes in 36-inch lengths and is used in factories, schools and
institutional buildings. (Thanks AL and Bill)
The dollar bill is just for
size comparison.
The thing next to the end of
the bill is a screw-in electric heating unit. The best one to use would be
rated "750 to 1000 watts, 220 volts" while the next best would be a
"660 watts, 120 volt" unit. Don't worry about the 220 volts, J
we will be using 120 volts for this!
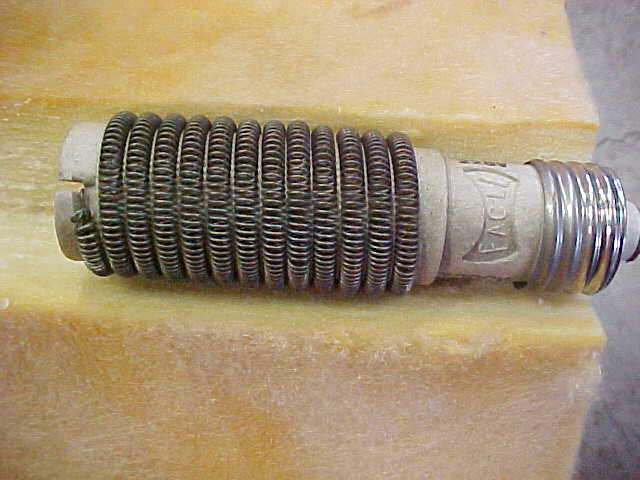
This is a better view of the
heater. They come straight sided like this, and cone shaped. It won't matter
since we will be unwraping the wire element.
If you can come up with the insulation
and a heater, the rest will be easy.
First;
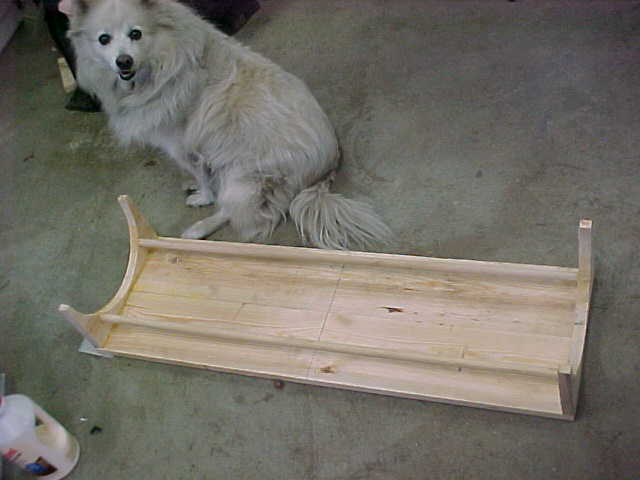
Build a cradle. This one is
36-inches long with 3/4-inch end pieces. I made the bottom out of the same
3/4-inch stuff; all of it came from a 1x6x8. The lengthwise pieces could be
anything; I used 5/8-inch dowel since that was on hand. The dog is not strictly
required but is strongly recommended.
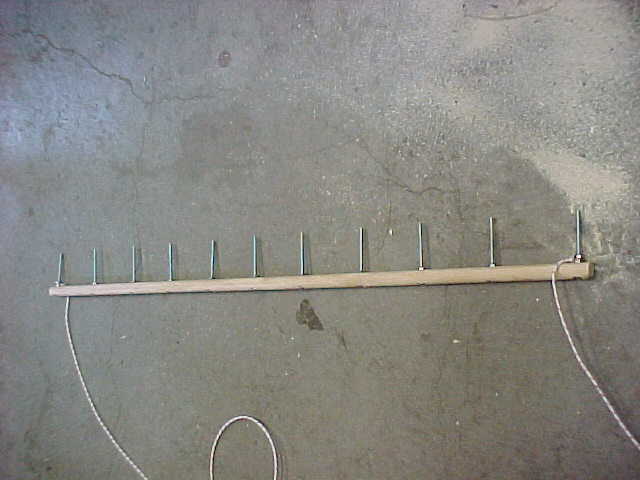
Now unwrap the heating element
from the ceramic form and gently stretch it out, trying NOT to straighten the
tiny coils. If you have lived a good life, the length will end up at 24 to 30
inches. In any event, get a piece of wood and put some #6 or #8 screws through
it every 3 or 4 inches. Fasten some wire to the end two screws (this will all
clear up in a moment).
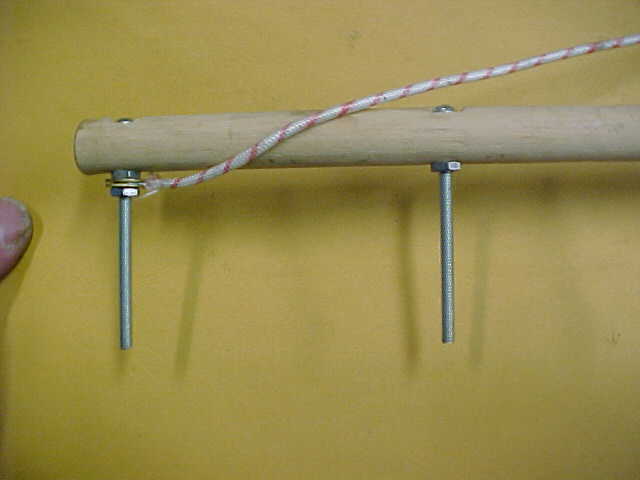
This is an end of the thing
shown above. The other end is the same, with a wire on the end-most screw. The
idea is that the screws will pierce the insulation, with the wood on the
exterior and about 1/2-inch of threads showing on the interior.
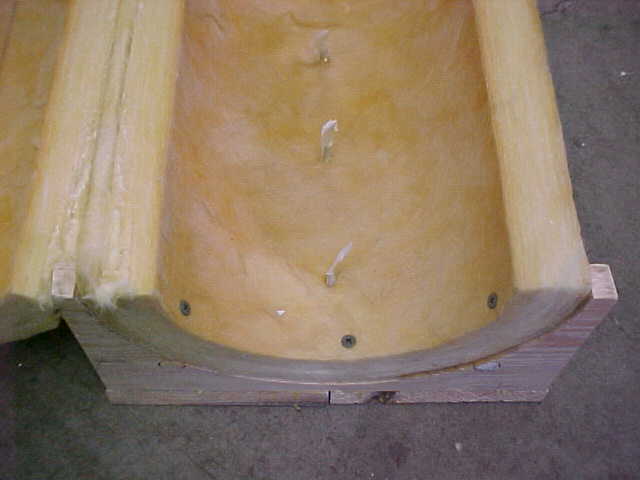
The pic above shows the
insulation fastened to the end of the cradle. I used dry wall screws; you could
also use flat head wood screws or roofing nails. Make sure the heads are flush
with the surface of the insulation as they are the supports for the end closure
pieces. Also in the pic are the screws sticking through the insulation, see
them running down the middle, covered with little pieces of masking tape? I did
this so I could spray an entire can of white engine manifold paint on the
insulation in an attempt to bind the fibers together.