IF
YOU GOT HERE VIA A SEARCH ENGINE THIS WILL TAKE YOU TO THE WAGNER HOME
Lettering (Stamping) Guide
The barrels of all firearms are required to be marked, so as to identify the ammunition that is to be used with that firearm. When the caliber is changed, the original marking destroyed or removed, or an unmarked barrel is installed, the barrel must be remarked/marked.
The marking is usually done with individual steel letter/number stamps struck with a hammer. If the stamps are hand-held, it is very difficult to maintain consistent alignment and spacing. See this page, midway down, for an example of a poorly done stamping job.
This tool or jig can be easily made using a drill press and hacksaw and
will allow a neat, straight, line of figures to be placed on a barrel. The jig is held to the barrel to be marked with a U-Bolt.
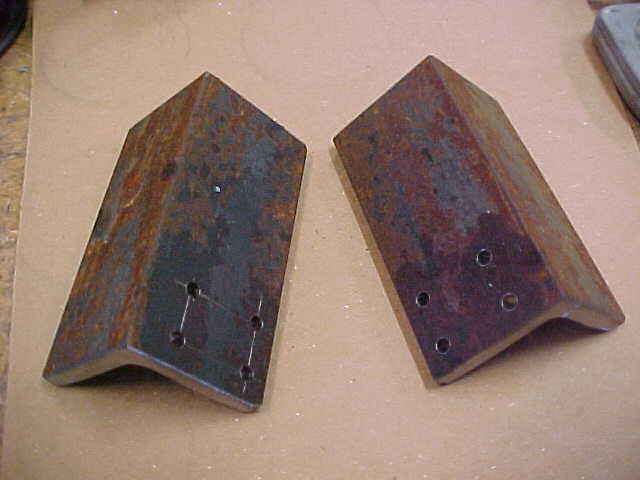
Two pieces of steel angle about 3-inches long with 1 1/2-inch legs have four holes drilled near one end.
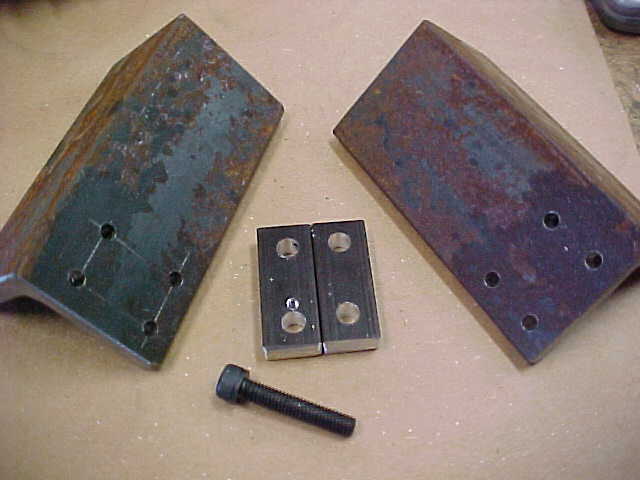
A spacer as thick as the letter/number stamps is drilled with four holes matching the holes in the angles is made.
The angles and spacer are fastened with four bolts and nuts. Note that the spacer is shorter than the legs of the angle by 1/4-inch.
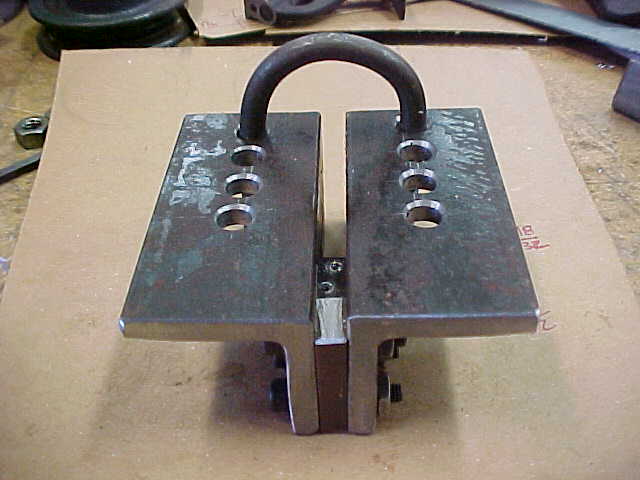
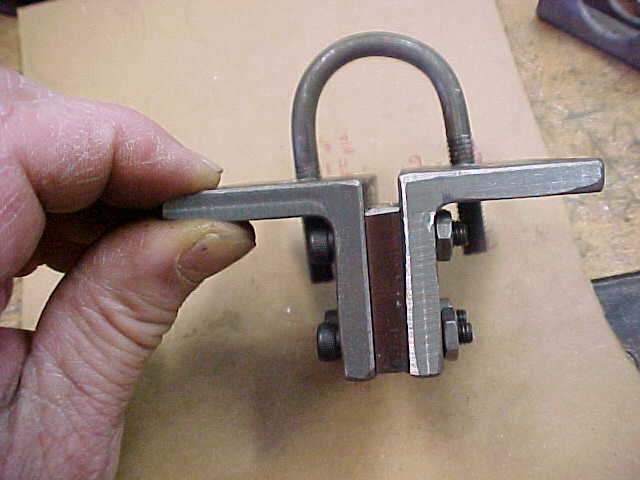
A 1 1/4-inch muffler clamp was purchased and the U-Bolt was salvaged. A row of holes was drilled in each "bottom" leg, centered on the space between the angles.
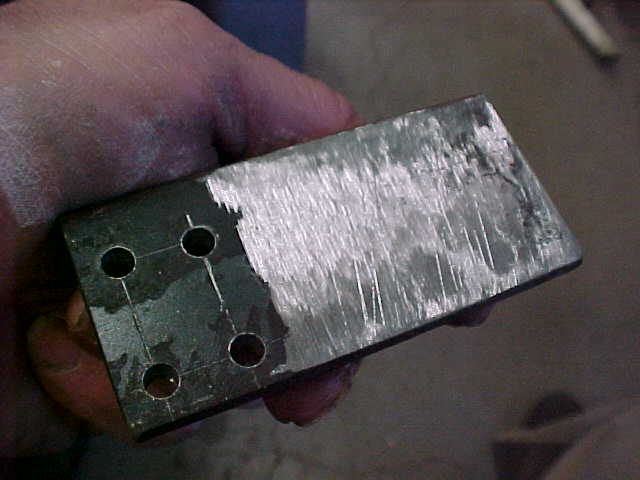
Before assembly, or rather after a trial assembly, the "inside" face of each angle was lightly ground. When assembled, with a shim cut from a pop can (not shown) next to the spacer, the stamps easily slid between the open legs of the angles.
![]()
The two black items shown above are stamps. My set had 1/4-inch square shanks about 2 1/8-inch long. If the stamps were placed next to each other, the character spacing would be 1/4-inch. This 1/4-inch spacing was more than needed and looked bad. The light colored metal bars are 3/16-inch square bars, 1 3/4-inch long. They were cut from a 12-inch length of "key stock"; the material used the make square key found in motor shaft applications. (About $1 for 12-inches, comes in a lot of sizes, mostly square, good stuff to have around) In use, the stamp is placed between the legs of the angles, firmly against the spacer, and the first character is struck. The first stamp is removed and replaced by one of the spacers and the stamp with the second character is placed firmly against the spacer and struck, and so on.
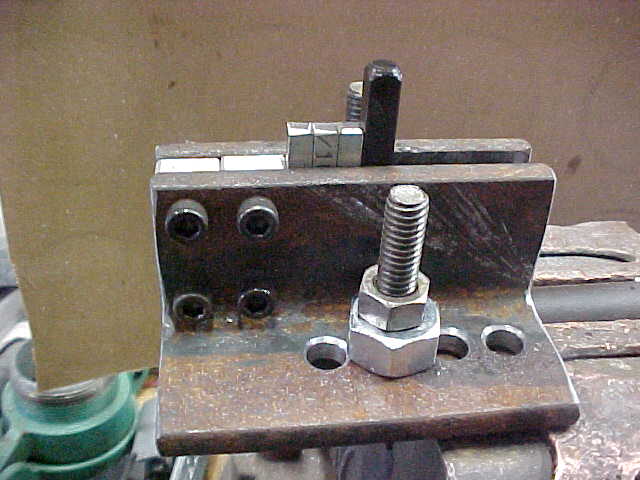
Here is the jig in use three spacers installed and the stamp with the fourth character in place ready to be struck. The spacers are a little longer than the angle-legs are high so as to be easily plucked out, but shorter than the stamps so that they will not be struck with the hammer.
My stamps had 1/4-inch bodies, so the spacer between the angles was 1/4-inch thick. I used four No. 10 socket head screws and matching nuts. My spacer was 1-inch wide, the angles 3-inches long, allowing 2-inches free for "stamping". As shown above, when used with a small diameter barrel, spacers (7/16 nuts) are required on the legs of the U-Bolt. You will have to adjust the angle spacer and stamp spacer dimensions to suit your stamp set. A two inch line of text/numbers is an awful lot, you may want to make the angles shorter. I drilled some extra holes for the U-Bolt, it seemed like the thing to do, but I guess one set would do.