IF YOU REACHED THIS PAGE VIA A SEARCH ENGINE
THIS WILL TAKE YOU TO OUR HOME PAGE
Modifing the M16/AR15 Service Rifle Front Sight
There are two common modifications that are applied to the front sight of the M16/AR-15 when the rifle is to be used in HiPower or CMP matches.
First, the threaded hole that accepts the "post" is drilled through, threaded, and a set screw is installed from below. This set-screw is then tightened, up against the re-installed "post", thus firmly locking the post in place.
Second, the sight base, normally pinned to the barrel, is modified by adding four set-screws in place of the pins. This modification allows "rocking" the front sight to insure prefect centering of the windage screw of the rear sight.
Lets start with the "post" locking modification. The front sight post is a piece with a flange in the middle, the sighting post above the flange, and some threads below the flange. Around the edge of the flange are four or five half-holes. Very early M-16/AR-15's used a round post and five half-holes, later models use a squarish post and four half-holes.
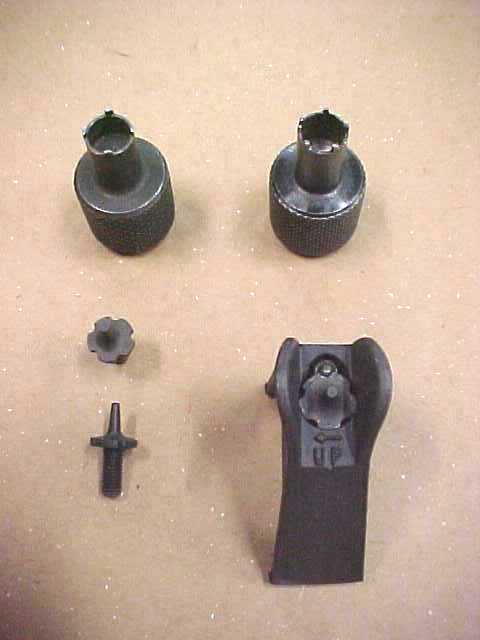
Above, we have some sight posts, the old style (five half-holes) on the left. Above the posts are removal/adjustment tools. The tool on the left has four prongs, and fits the newer posts, the one to the right has five prongs and fits the older, round, posts. To the lower right is a sight base with an old style post, having five half-holes, one of these half-holes is filled by the post locking plunger.
NOTE - Most "match" or target rifles use the new style post. If you have an older style, you can replace it with the newer with no hassle, just unscrew the old one and screw in the new. The post can be installed/removed without the tool, but the tool makes it much easier. Anyway, the post is kept from rotating by a spring-loaded plunger that engages one of the half-holes in the flange. To remove the post (or to move the point of impact DOWN), push down on the plunger and unscrew the sight. To reinstall, reverse the process. It's much easier to use a tool, but if you are removing an old style and installing a newer style, just buy a new style tool (one with four points), and work out the old post with a nail or some such thing.
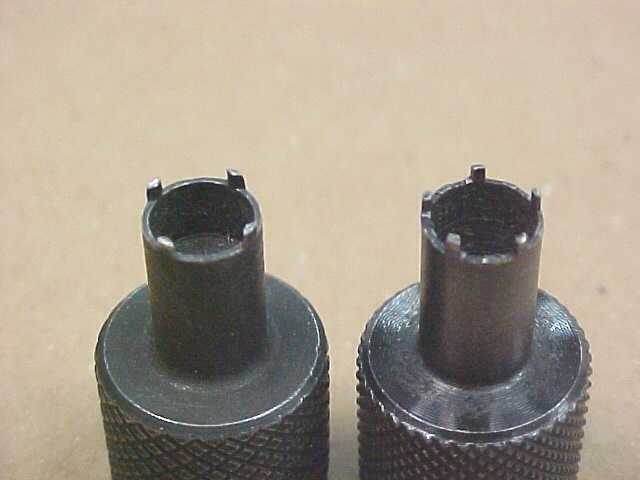
Here is a close photo of the tools. Make sure that you get the tool that matches the sight that you are GOING to install. You can remove the post with a nail or punch, but it's a real pain to install the post that way.

First, remove the post, that is unscrew it, while holding the plunger down. Once the post is unscrewed, you have what is shown above.
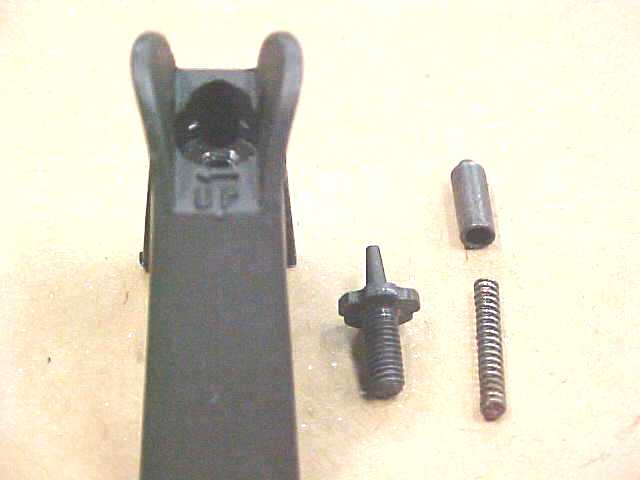
Once the post is free, remove the plunger and spring, as seen above. BTW, the spring should be 3/4-inch long, less a few thousandths. Sometimes the wrong spring is found.
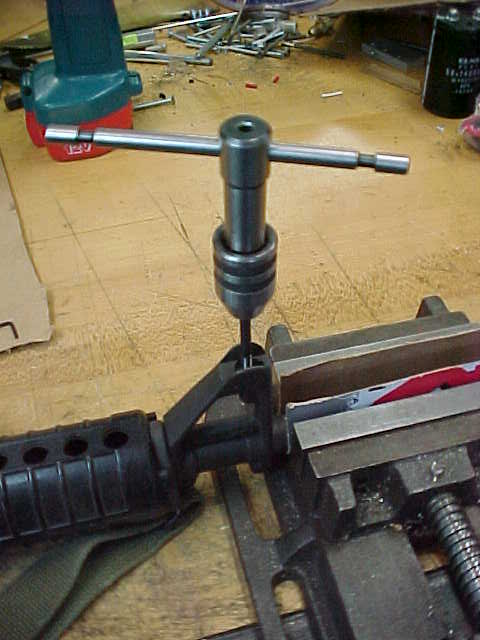
The threads on the post (and in the sight base of course), are #8 x 36, also known as #8 Fine Thread, and #8 SAE (Society of Automobile Engineers). In order to install a locking set-screw, the hole is drilled through the base, and the existing threads extended completely through the hole. The existing hole is drilled, using a hand held electric drill and a number 29 drill bit. Be careful hold the drill straight in the hole so as not to abuse the threads that are already there.
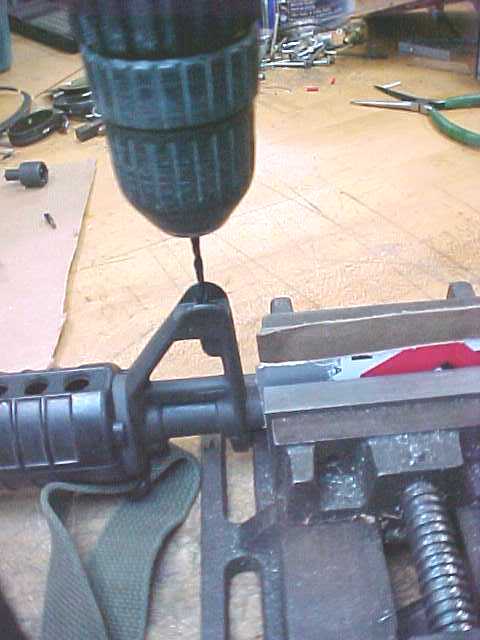
The barrel is being held in a $9.99 drill press vise with some cardboard for protection.
Next, a #8x36 tap is engaged in the existing threads, and then new threads are cut until the tap extends through the hole. Use a little oil on the tap and go forward one turn then reverse (unscrew) the tap a quarter turn until through. You can remove the tap and clean the chips off from time-to-time if you feel it's needed.
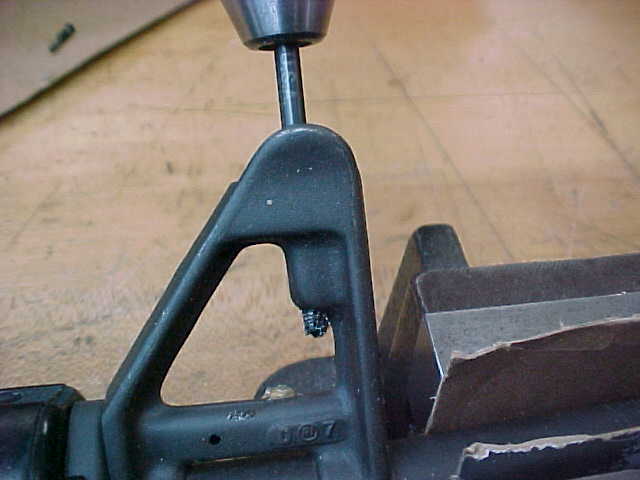
This is all the farther the tap can be passed through, as the threads of the tap are all used-up, that is bottomed out at the top of the hole.
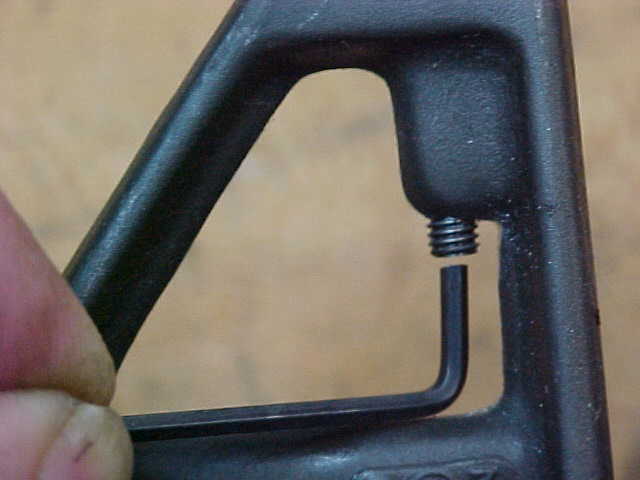
Now take a 3x36 set-screw and insert it in the top of the base as if it were the post. Using the long arm of a 5/64-inch hex key, screw it all the way through until it falls out the bottom. This insures that the threads are OK the whole way through. IF IT DOES NOT EASILY PASS THROUGH -- STOP !!
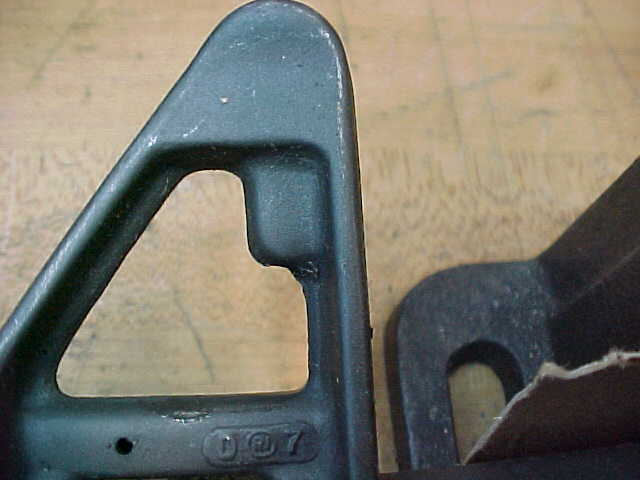
Look closely at this picture and compare it with the one below, note the area pointed to by the pencil in the lower photo.
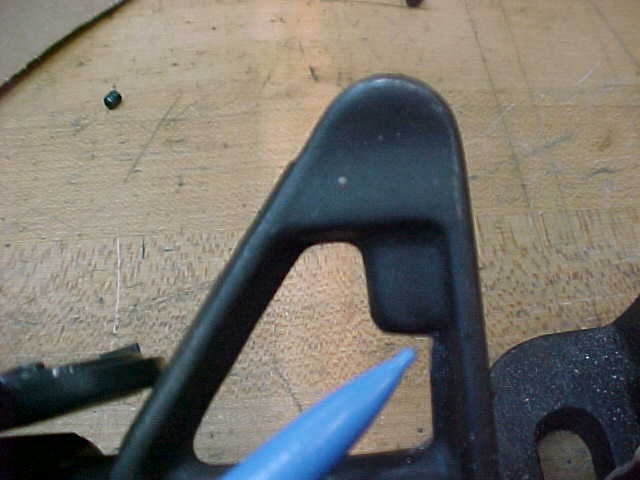
This base casting needed to be filed so as to remove the rounded area, and to flatten the bottom of the threaded area. I didn't need to re-tap it, after filing, the set-screw passed through easily.
After making sure the threads are OK, insert the #8x36 set-screw, 3/16 or 1/4-inch long, in the bottom of the hole. Use a 5/64-inch "allen" wrench, with a modified short arm, to move the set-screw up into the threads. Then reinstall the spring, plunger and post and screw the post down until the flange is flush with the metal-work of the sight base. It won't hurt to use a little grease on all of these parts.
With the rear sight elevation knob a quarter or half-turn up from the bottom, zero the rifle at 100 yards by moving the front sight up or down. REMEMBER - MOVE THE FRONT SIGHT UP TO MOVE THE POINT OF IMPACT DOWN - AND DOWN TO MOVE THE POINT OF IMPACT UP - just the opposite of the rear sight !!! If you have a round post, you can engage the plunger in any half-hole. If you have a square post, you can use any half-hole. If you have a rectangular post, you can use only two of the half-holes. If you have a post that tapers, the wide side of the taper is toward the shooter, and you can use only one of the half-holes.
Once the rifle is zeroed, elevation-wise, use the allen wrench and tighten the set-screw up against the bottom of the post. This will lock the post in place and prevent the post from wobbling.
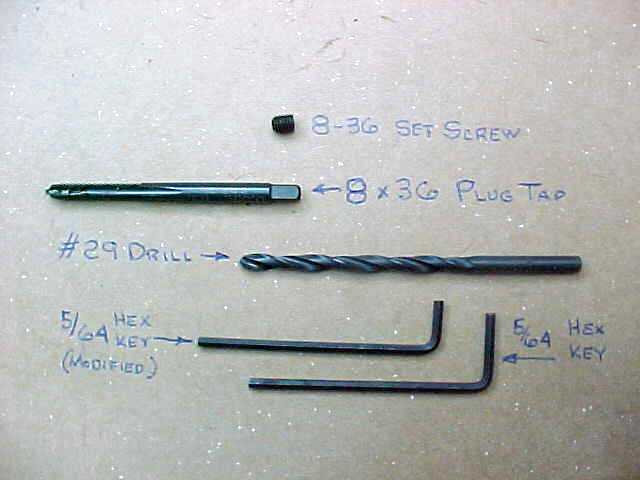
These are the pieces required. Only one hex key is required. The key is modified by shortening the short arm by 1/4-inch. If you want to buy these items check out this.